Monday, December 26, 2011

the house, in progress!


OK, i'm just showing off my baby now. Here she is, being SO super happy in the jacket mommy made her. yes, she finally fits! once I set up my sewing room, I'm making more clothes...someday.

June's nursery was the first we really put the effort into decorating, of course, since she's the princess of this household...: ) we love the "silver sage" color for the walls and the yellow that I've been wanting for her little closet! It still needs shelving built into it, but for now, she's gotta use the closet hanging bar for her little dresses/jackets.
the seating has to be figured out still. we grabbed the old wooden chair from the SF house and our living room ottoman will do for now. got rid of the rocker/glider b/c we didn't really care much for it.

here's her little yellow closet : )

her toys in the corner still. don't worry, june will play with you guys when she's old enough!

And now...
on to the kitchen. After our friend Paul removed the cabinets, he pointed out mold all behind the cabinets in the sink area. The sellers were unethical in just covering up the mold. We're thankful that we decided to gut the kitchen, otherwise who would've known what would've caused us to be sick! So evil...: (

Anyway, before the cabinets were installed, we hired our contractor to completely patch up walls and remove tiles so the kitchen team could work. He did a great job.

This color is Behr's "Gentle Rain", which is a grayed lavender (carried over from our SF living room, but much more muted and desaturated b/c it works better for this house). I picked this over a yellow for the family room and the kitchen because it seems very serene. not too much drama or warmth. Also b/c the kitchen I had always pictured a cool white, I wanted the two rooms to flow into one another, so decided to use the same color. I know yellow and white could've worked for a kitchen scheme too, but in my head i just couldn't see it for our house.


Here's a shot of the stairs near the entry.
I chose a light warm gray (Behr's Sandstone Cliff) for the rest of the house: stairwell & hallways, as it is a very pleasant neutral that I think blends seamlessly between rooms...we also had our painter paint the banisters white for us, which made it look a lot more upscale! what a difference paint makes!

Monday, November 28, 2011

playing house : )

So...the months of hiatus from this blog is inexcusable, but my excuse is we bought a house! It's our first home, and really, we took everything into consideration for our precious baby June. She's solely responsible for this decision--it's a nice quiet house in a cul de sac, and a huge-mongous backyard for her and her little friends to run around in! Not to mention great schools...she's not even talking yet and her future is already set!

It all sounds great, right?! Well, this house was pretty trashed by the previous owner, and then someone bought it for the sole purpose of flipping it to make a huge profit. Poor us, we now are dealing with major renovations such as gutting the kitchen. But it's coming along! Oh, and these are not the initial photos of the house. We had popcorn ceiling already removed and recessed lights put in...so it looks a lot nicer. :)

The paint colors literally took me months to decide, and it tormented me: I kept waking up in the middle of the night and would change the colors in my mind. But it's all turning out so well, and i can't wait to post the before/after photos soon! I'm psyched (well, other than the fact that I've taken the rest of the year off of work to deal with contractors..did i tell you how much i hate dealing with them?) about actually decorating and making this home ours, for the first time in our lives.

Stay tuned for progress photos!
Entry way area, shot from the living room. those banisters must be repainted...should the tile entry stay?

Dining Room: LOVE, LOVE these french doors...too bad we don't have the key to the lock, which has to be replaced...but here, i'm already playing with the right accent wall color to make a silver tree stump dining table base I bought from z gallerie pop (promise I'll have a pic of it soon...it was an impulse buy and I'm anxious to get it into the space...)!

Living room view: the corner is where the baby Grand my dad bought me when I was a kid will sit...i HAVE to figure out a way to do built-in window seating...i've always dreamed of having that...hope this color works...

Family Room shot...thought about doing yellow paint, but decided it was too much.

this USED to be a bar sink...


but my brilliant hubby suggested knocking it down and converting into a pantry, since we have none.

See the swatches of tester colors on the left wall! This was the biggest challenge for some reason. Probably b/c I kind of wish this fireplace didn't exist.

Ta-da!! The "butt-ugly" kitchen. Sorry if you like it...but I personally think it's too busy and makes the already small kitchen even smaller. Plus, everyone who's seen it has said it's the worst job of cabinet installation they've ever seen. We've decided to gut this...stay tuned for IP photos!

Here's our Craigslist gem, Paul, who came to buy the cabinets off of us and did an amazing job demo-ing the kitchen. We felt like we should've paid him for the great job!

Then, contractor came and finished the demo, plus replaced the drywall...

The laundry room, looking into the family room. In the picture the hardwood flooring looks fine, but in actuality there's water damage and sun bleached spots. We're ripping that out too...(are we crazy?)

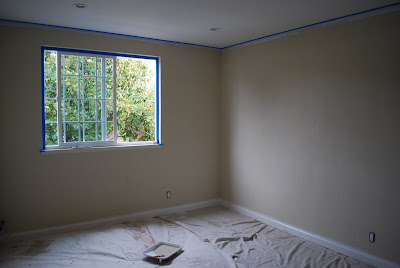
The downstairs guest room/sewing room/office: I put my dress form in there to figure out the right shade of blue for the walls...the recessed lighting makes a big difference!

follow me UPSTAIRS now...
Baby June's future room. aka our guest room right now...

Oops, this was too quick of a reveal! You can already see our painter Brenden working hard in June's current nursery! I decided to change the color from her nursery in our old house just for a fresh beginning. I'm LOVING the color. (Silver Sage from Restoration Hardware) So much so that we're using it in the living room downstairs.

now the master bedroom--again, didn't post the before...but we LOVE this blue-gray color. Hubby tells me to go with my natural inclination for a color and then take it up a notch in boldness. He was right. I almost settled for a paler version of this color.


And that's all for now! I've been following several blogs for inspiration along the way...so I can't take all the credit for this home makeover. But it's fun (very stressful), and it's coming together!

Saturday, October 29, 2011

baby June in mommy's dress


Thought I'd share a photo of my baby girl finally able to don the dress I made her before she was born. I am definitely interested in someday making/designing baby dresses to sell...someday, when I have the time! :)
Here's my little sweetie hanging out in my favorite fabric store in SF! Look how happy she is!

Saturday, July 23, 2011

jj design swaddles : )


My sweet baby posing in mommy's swaddles! Mommy loves you! (photo credit: Duncan Ramsay)


After having baby June, my life has been about a few things: feed, change & swaddle baby. After being a mom for 6 weeks now, I realized that my favorite thing for swaddling is a stretchy blanket that she keeps spitting up on, or pooping on...and I have to keep washing it. So I decided to make a few of these to lighten up the laundry duty...I love the fabrics I found and can't wait to use them! I have made a few for sale too.

$25 per blanket. Please email me if you're interested and I can let you know what's available.

Tuesday, July 12, 2011

announcing the arrival of June


After scouring different sites for baby announcement cards, I decided to try my hand at making one for June in Photoshop. It was fun, and a challenge to come up with a good design that also utilized photos I liked (which, by the way, were photos my sister took of her when she was only a week old).

Wednesday, June 8, 2011

dress in the making...


Okay, final project before Baby arrives. I had meant to make this dress to wear my last weeks of pregnancy, and then wear it again after the Baby, but looks like I'm now going to only be able to wear it after she's here. : P I'm hoping to finish soon!

Cover for Feeding Baby


A dear friend got a nursing cover for Baby and me and I decided to try making one myself. And I'm pretty happy with how it turned out!

Autumn Tree


All in a day's work! I finally finished this piece for a production designer at Pixar who saw my "Orange Tree" piece for Ghana (an art auction to raise money for an orphanage in Ghana) and wanted one for his daughter! He wanted to commission me to make one, but I thought trading artwork would be awesome, and he agreed. :) I hope he likes it, and will still agree to trade with me!

Tuesday, May 31, 2011

Baby's Room--Unveiled!


tada! Baby's nursery is finally basically done (still a few pieces of art I'd like to hang, and maybe a rug...but the essentials are there!), and is awaiting her arrival (in a week!)
Hubby and I are so proud of it, as we put countless hours in there, toiling away, realising this vision of mine. :)


Here are some of Baby's friends waiting patiently for her arrival. Hubby insisted on getting her a Totoro, from one of his favorite Japanese directors--Miyazaki, who created "my neighbor Totoro".

I have to say, this may be one of the most daunting home improvement projects to date, since as early as January, we decided it would be a good idea to peel off the ancient wallpaper that had been painted over several times. Let's just say, I was 4-5 months preggers when we started the painful process of removing wallpaper with mere credit cards and some scrubbing sponge as our tools (We had bought wallpaper removal tools and those were pretty useless) We discovered not just 1, but 3 layers of wallpaper, some as old as the house (100 yrs old!), some plaster, and a layer of cardboard. On top of that, probably lead paint. Hubby decided to do most of the peeling himself in fear that the lead would be bad for Baby. So...we estimated over 100 man-hours just peeling wallpaper, and then scrubbing down the walls...and finally painting.

Needless to say, after the huge undertaking Baby's room remained bare for the next month and a half, until we gathered enough motivation to finally start furnishing and putting the finishing touches on it.

My vision had been to use the most neutral gray color for the wall and let yellow and cream be the dominant colors, folllowed by green and orange, and other vibrant colors. And it looks like we achieved it!

We both are very happy with how everything turned out, and how organic the process ended up being.

We had the idea to have our friends participate in making some fabric art for Baby--it was supposed to be in the form of a fabric book for Baby, but I thought framing them would be cool--unfortunately we couldn't frame all 14 of them, since we didn't know at the time we would really be framing them and some of the pieces ran all the way to the edge of the squares of fabric so there is no seam allowance for framing...so the rest will be made into a book, or something really cool. I made the bee w/flower, and Hubby made the little Japanese monster at the bottom. My hope is that Baby won't get scared when she sees him. haha.
The dresser was the last to arrive, and while the yellow wasn't what we expected from shopping online, it works fairly nicely with the decor. The rocking chair actually will be replaced in a couple of months, as I had wanted to cover the chair but got cold feet just thinking about it. I didn't think I could do a great job and just rather purchase something that's even more comfortable. I actually now like the pinky mauve color, but it's too late to take back the order...the new chair will be a taupe-beige micro-suede.

Finally, we're still looking at getting a round rug to echo the round motif in the room, but we know it'll get dirty over time, so that's still on hold...like I said, the room is ready for her, but if we do get more time, I'm sure to be putting a bit more artwork in there!

To fully appreciate all the effort that went into this room, here are some horrid "before" pictures of the process...

This was the Chinese red sewing room before the peel began...

'cross the shoulder birdie bag!


in between working on baby's room and finishing up some pre-existing custom orders, I managed to create a new pattern for a co-worker who wanted the birdie bag that she could carry across the shoulder. I took on the task partly because I had wanted to make a bag just like that, so it seemed worth looking into. I'm glad I did--I now have a pattern that I can use to make other bags with different fabrics (don't know when I can use the fabrics I bought in Paris back in March!)...and even make modifications to improve upon it.

For sale for $50. Comes with an inner patch pocket for those smaller items!

Thursday, April 21, 2011

baby quilt square


Made this baby cow w/a pacifier for a dear friend's baby shower, in which we (several friends of ours and I) came up with the idea to make her a baby quilt. Each person at the shower would make an animal, or whatever they'd like, from felt or other scraps of fabric, and A would stitch the pieces together, since she said she was bored and needed something to do. ;)

Anyway, I'll post a photo of the quilt when I get to it, but here's my contribution. The intricate pieces took a while to stitch together, but the result was super cute and she was happy! And that's all that matters. :)

Wednesday, April 20, 2011

First-eva 13" Macbook Pro laptop case...


Dimensions: 14" x 10"; handles each 14.25" long. Front pocket holds the battery pack nice and snug. :) $75

Part of the reason I haven't been blogging is that I've hit a wall with sewing. Perhaps with the baby coming in 2 months' time, my anxiety level has gone way up. Two weekends ago I attempted to cover a plush rocking chair for the nursery, and broke down crying b/c I was so tired, and it seemed like such an undertaking (but who can blame me when rockers/gliders that I like cost at least $500?) But suddenly, last weekend, a surge of energy returned and I was able to tackle some of these custom orders--finally!

Anyway, the idea of making laptop cases came from a dear friend of mine when I showed her my giraffe & elephant clutches a while back. Since the clutches were semi-circle shaped and a fairly large size to be considered a "clutch", she suggested that I make laptop cases. So I actually had been hoping to explore this for quite some time now, and just never got around to it--until another friend of mine asked if I could make one for her sister's 13" macbook pro.

My confession: the process (for some reason) wasn't as easy as it should've been...or could've been. I blame it on my dislike for putting zippers in...and this one was a bit more challenging since I had to put the zipper into essentially 3 layers of fabric (lining, outer fabric, padding), and then have the laptop fit snugly. Probably the part I'd like to figure out how to do better is how to sew the lining in after putting the zipper in...

I have to say, I'm actually very pleased with how it turned out, and hope that IF I were to make new ones, that it'd go a lot faster. This was 2 nights worth of work, which isn't bad, esp. since I was thinking it through in the process. Anyway, hope my friend likes it! =)

Giraffes + Diapers = Giraffe Diaper Bag!

I received another custom order from a fellow expectant mom, and she wanted the diaper bag with the giraffe print & off-white canvas base...so here it is! I really like how it turned out and hope she likes it!


Actually am in the process of making another for a friend, who also wanted the giraffe print but with the same color scheme as the original elephant diaper bag. I think I'm going to be making one for myself when my baby comes too! :)
For sale for $80. Any customization may be more. Thanks for looking!