Tuesday, January 22, 2013

At last!!! Updates to Home Sweet Home...

It's been a busy month, even with an extended month off from work, I actually feel more exhausted than when I was working--but a happy exhaustion at that, as I am finally making over the home!

It has been a year since we moved here, and while I was happy generally with the house (newly painted and all), I wasn't quite as proud of the decor--because there was none to speak of.

So this break, I wanted to focus on a couple of spaces in our home (Hubby warned me to not be overly ambitious, so I tried...hmm...), and even though it's not entirely done still, I couldn't wait to post these for you.  Thank you for waiting so patiently!

Family Room
"In Progress" photos:
The in-progress family room...shelf to left of fireplace to be replaced soon.
I should add that things started to come together for me after I found these great mustard yellow and gray decorative pillows (I'll have a close up soon), and then I found the courage to go with a WILD safari rug (wild for me, since I'm usually pretty tame. haha.  Lesson learned here is sometimes you just have to get one right piece first, and the rest will fall into place!
The newly improved fireplace, with some ferns growing inside of it!
I spent a couple hours scouring the inside of this 20+ old fireplace.  I don't think anyone has ever attempted to do it, as it was super SOOTY.  For days, I contemplated on how to brighten up this little space without completely rendering the fireplace useless (lest someday a family after us wants to use it...yes, I am a long-term kind of gal).  I thought about painting it, but if someone were to use it, the paint would bubble and peel off (found out fireplace parts need to be painted by the manufacture, or at least I was told).  So I'm proud to say that I found my solution to the fireplace beautification problem at Marshall's, where I had been a dozen times the last 2 weeks--always looking for some home decor inspiration.  Anyway, what you're looking at is a gray-n-white zig-zag contact paper!  What a brilliant idea! (pat, pat : p)  That way I can peel it off if I ever wanted to change the decor.  

I envisioned a aluminum planter, but found a painted metal one at IKEA.  Since all the ferns were close to dying there, I picked up a few healthy ones at Home Depot.  The artwork behind it is a drawing I did when I was little of a bundle of withering flowers--didn't know where to put it, so thought it would look neat inside.


My first wall gallery of art by my artist friends, ourselves, & even baby june!

Above you'll see the gallery of artwork.  It's just the beginning--I know I have some prints that I still have around somewhere, but I decided I would start with what I have and build upon it.  It ended up being a lot more colorful than I had thought, but I kind of like it.  Baby J's handprints at 5 months is on the top right--I just love that she contributed to the wall too!  And Hubby's watercolor painting of us eating his chicken katsu (japanese chicken fried steak) on a V-day from ages ago, I finally decided to feature it. :)

NOTE: see the doorbell on the upper left of the picture gallery?  (Before pic below)  Well, I decided for now, I would paint this eyesore out with the color of the wall.  It kind of did the trick, not drawing too much attention to itself.  Yes, I was feeling quite pleased and handy. ; )

"Before" photos:
This is a shot of the fireplace about a year ago...
Then some mindless adding of "stuff".  Particularly not fond of the shelf lined with DVD's.

Hubby's video games spewing out of the TV console...oy!
Oh, how "lucky" we are to have 2 fireplaces!  My mission was to beautify it.
My very handy Hubby unrolling the newly purchased rug, just 2 weeks ago!

Baby J's Bathroom
Since my last bathroom art post, I have done a great new thing (not at all well-represented in this photo since the bathroom window is always going to create a backlight unless I become a master at shooting these shots--maybe in another life)--I hid the fugly (freakin' ugly--I don't use swear words) shower doors in June's bathroom with a simple solution!

I bought a brushed metal tension rod from Target and, remembering I had some semi sheer windowpane curtains (I had made almost 10 years ago for my first apartment, then we used it in June's first nursery at our last place), I hung them high off the ceiling to hide the shower doors we can't afford to replace.  This also makes the bathroom feel more elegant and more spacious because of the dramatic height of the curtains (taller than the standard shower curtain height of 72").  


Hmmm, no "before" photos of the shower doors, but I thought you'd like to see how much Baby J enjoys her new bathroom, right when she woke up!

Living Room
If you remember from my very first post over a year ago (*sigh* another reminder of how long this has taken...) of our house, you'll see that this was a very inexpensive solution to create the window seating I had always dreamt of but couldn't afford, and don't have the skills to build.  
The original window before moving in...
The new window seating, with added upholstered by me. :)

This was an IKEA Expedit shelf turned on its side.  I wanted a built-in shelf but no one in my family (basically myself and hubby) is handy like that, so we built this one with baby J's help!  Then I bought foam on sale at Jo-Ann's, and upholstered the cushion, finished with piping that you can't even see...great. : p

Anyway, it was exciting to see it come together, after seeing so many ideas on Ikeahacker.net.  I intentionally made the cushion longer so that it would stay in the window opening.  I love that baby J has a little more storage for her toys and books.  She seems to enjoy it too.

Thursday, December 13, 2012

And the 14th Annual Pixar Craft Fair...


...was a huge success!  My apologies for not updating my blog after so long!  Life has been full!  Good, but FULL.  Not including my recent trip to Japan for 9 days and came back with a suitcase full of AMAZING japanese fabrics!  aaaaahhhh!!!!


My friend took this photo of my area while it was being set up....I had forgotten to take a picture of it with my SLR, so this is all I have...a bit messy, but you get the idea!  : p
After many months of sewing/designing/stressing and more trips to the fabric store than I'm willing to  count or admit to (was it every weekend for weeks on end?), I finally unveiled all the hard work at the Pixar craft fair the past 2 days.  Woohoo!

Boy, I am exhausted, but grateful!  Grateful for the opportunity to work towards something that I am so passionate about.  Grateful for the chance to showcase all the hard work I have put into this...with a full time job and a budding toddler, it has been difficult finding any kind of spare time to create.  And yet, without it, I am simply not complete...somehow the scale is tipped, and I am off-balance.  My happiness is dependent on my finding that "perfect" balance of life, work, and art.

Ok, getting all philosophical here.  Hee hee.  I'm simply giddy from all the interactions with such wonderful people that came by my booth the last 2 days!  All their support and even when they were simply admiring, all that meant so much to me.

My camera died this morning as I photographed the last couple of bags I had sewn in a week after getting back from Japan (those fabrics were so amazing that I had to kill myself to make them into the craft fair--and honestly, I think THEY made the show), so I'm going to post a portion of what I had at the fair these past few days...


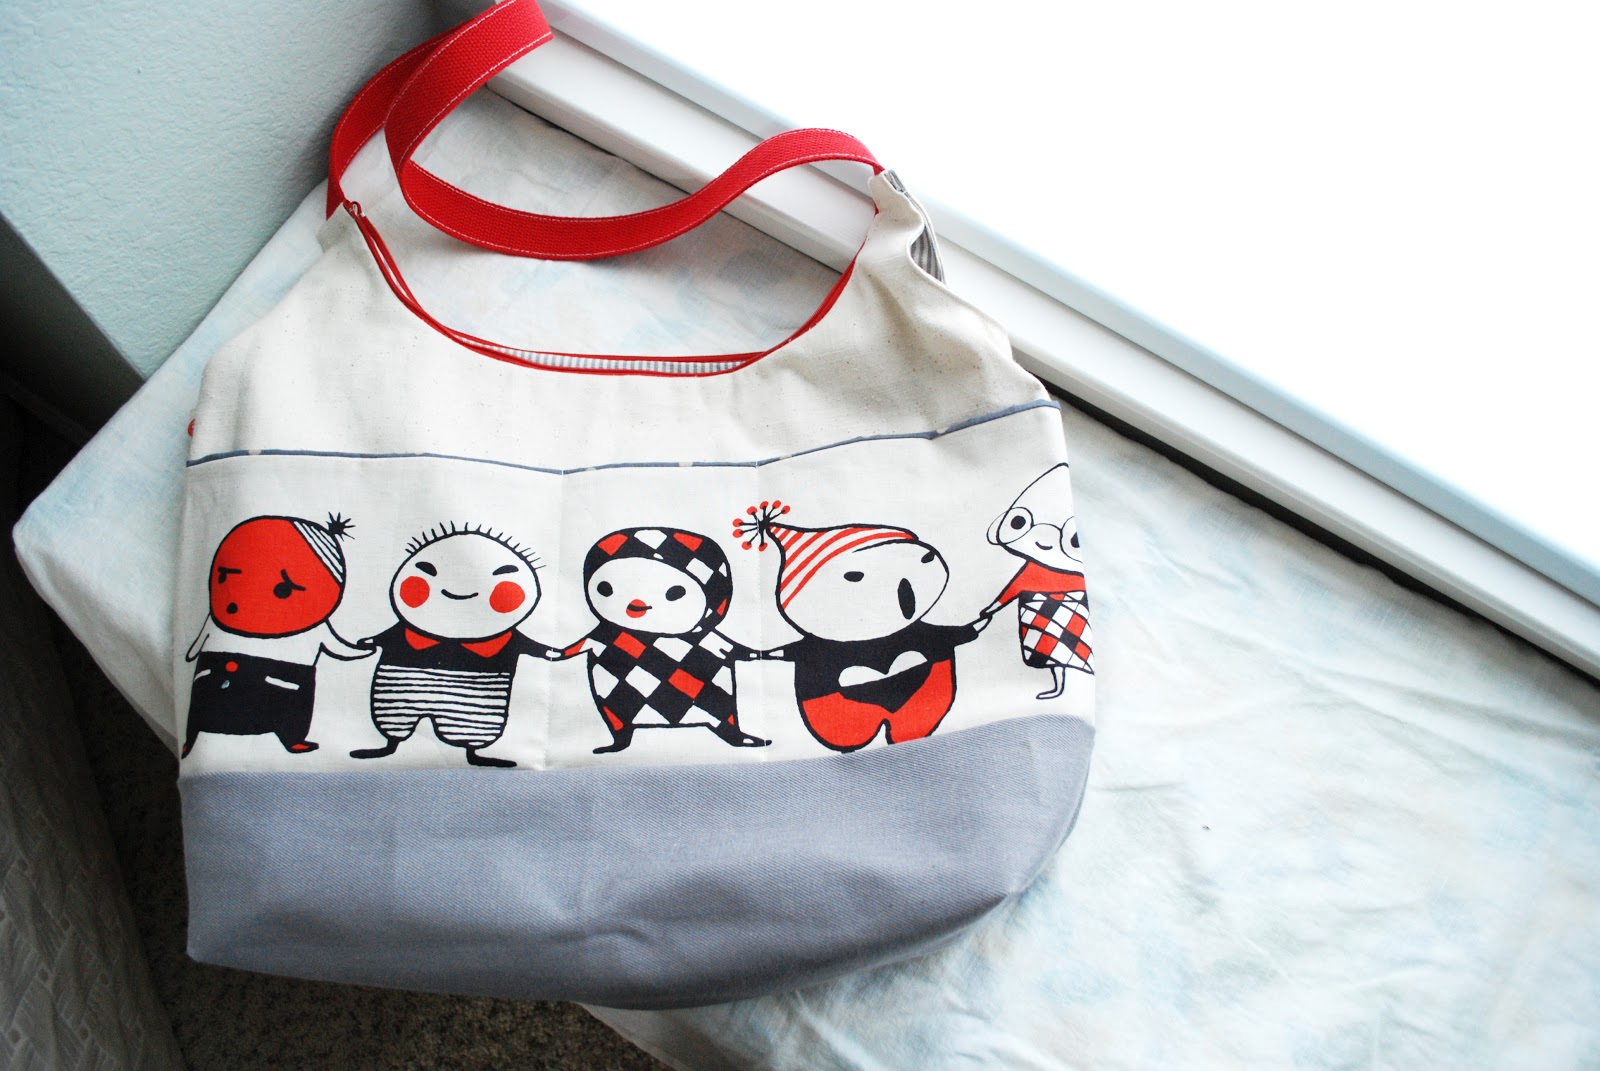
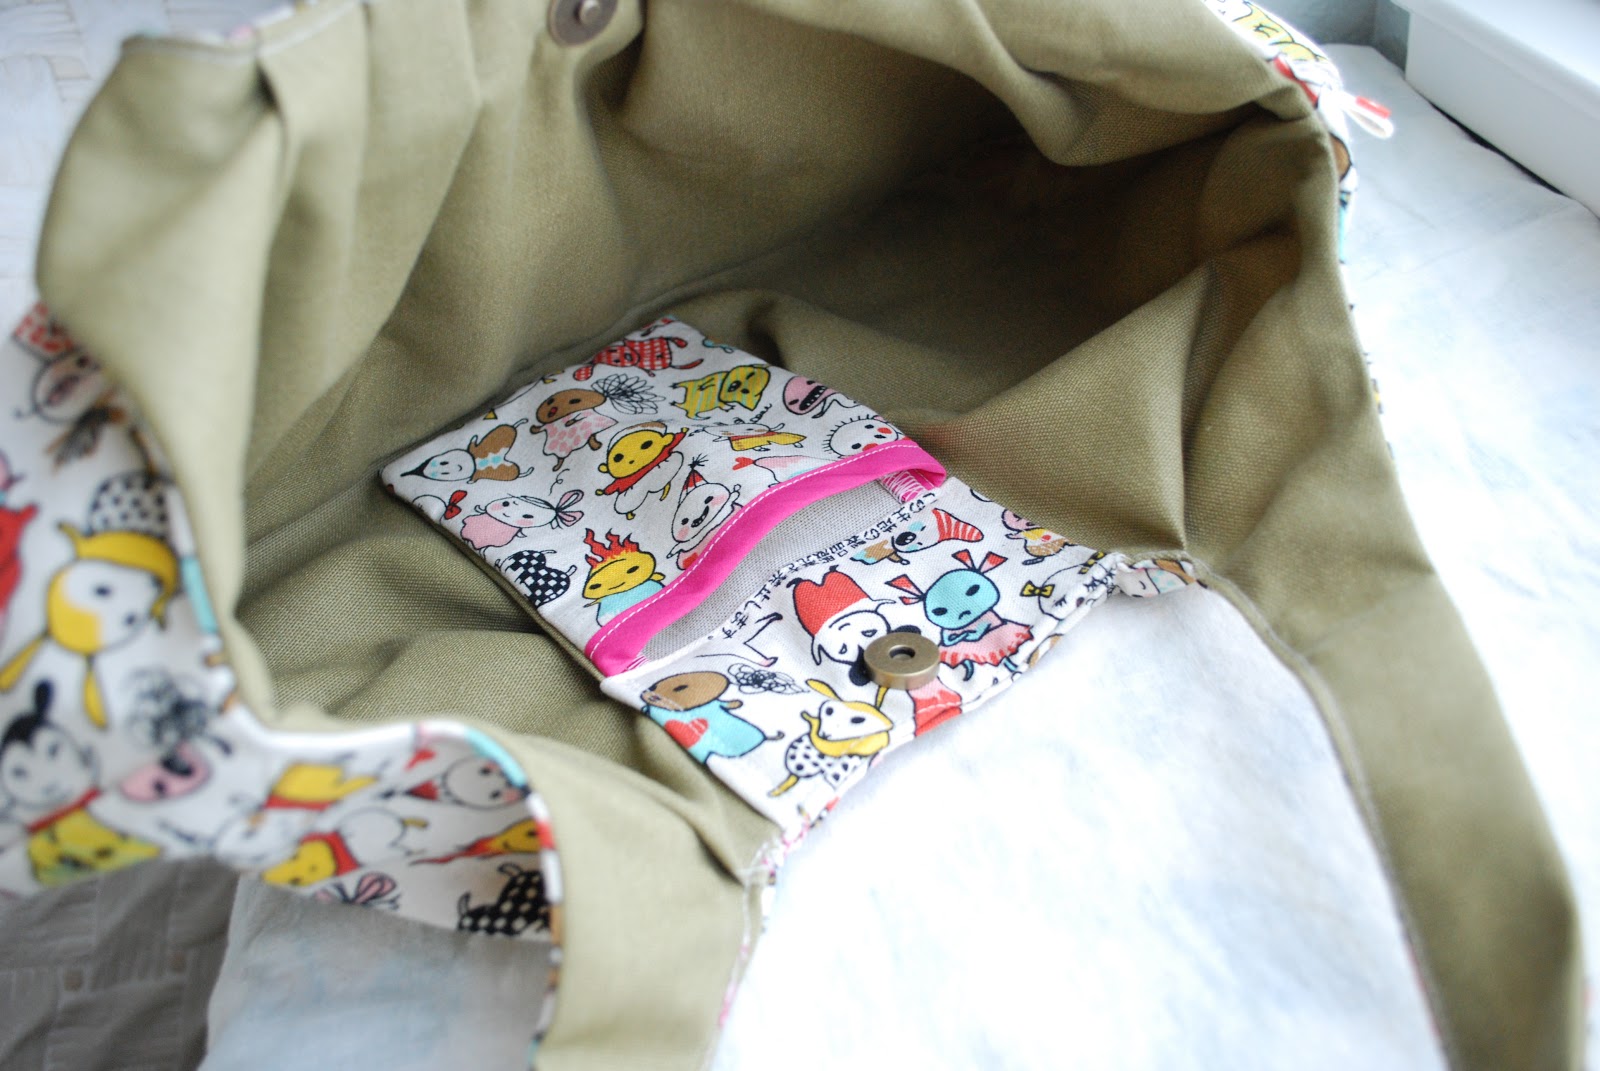
JJ's FIRST-EVER super duper "Lil' Peeps" diaper bag!  (Front view) Features durable canvas body, 10 pockets inside and out.  Also a hanging strap for over the shoulder and stroller.  Zipper closure.  Comes with 4 options of Lil' Peeps lineups.  It'll be a surprise what you will get.  :)  $115. Custom order, please inquire soon before fabric runs out!
Semi-aerial view :)
Back view.  Look how adorable they are!  


"Lil' Peeps" pretty pleated purse. $80. 4 options of character designs possible.  

Owl Mini Tote--Reversible $25 (SOLD OUT)
Owl Pleated Shoulder Tote $40 (SOLD OUT)
Owie Canvas Shopper $30 (SOLD OUT)


Reversible Owl Tote $55 (sorry, SOLD OUT)
Look at the inside!
I'll be posting more when I can resurrect my camera, or find a camera to unload my photos with!  Stay tuned!!

Ok, a coworker let me borrow his battery power, so here's some more photos:
"Hip-hip" tiny tote in blue hippo print: $25. Custom order available.
"Don't Pet Me" in navy: $75. SOLD OUT!!!

"Don't Pet Me" in Ivory/Brown: $75. only a few available.


Reversible Lil Guys tote. $65. (SOLD OUT till I can get more fabric!)

Reverse side of Lil' Guys tote (see below)

Lil' Guys fabric purse! (2 available, $75)
Take a peek inside!  Japanese words say: "It is illegal to reproduce this fabric"


Sunday, November 4, 2012

leaves + bunting = new bathroom art

Baby j's bathroom is one that when giving tours to our house guests, I seem to apologize for the most.  Why?  b/c I actually was disappointed with the paint color I chose, but really only because I don't love the bathroom vanity that came with the house, but am not handy enough to do anything about it...(I think in another life, I would be a carpenter. ha!)

Anyway, I woke up on a Saturday morning just last weekend (like 4 am) and had the idea for baby j's bathroom.  I wouldn't say it's brilliant, but I just love how simple the designs are and how easy it was to execute.  It took me a few hours, but they were fun hours!  I had found 2 nice frames from Marshall's for $9.99 apiece that already came pre-matted, and was eager to get started.  lovely!

Here are photos, w/o further ado...(kind of step-by-step showing how I put it together--hot glue gun is my friend!)
                                     
1. lay out the design: i just used some scrap pieces from the laundry hamper I had just made for the bathroom, to tie them all in
 2. hot glue gun magic--pull taut and press down, to the back of the masonite board that came with the picture frame.
3. Give it a nice press with the iron--wrinkles are unforgiving when it's a framed art!
 4. I remembered to take pictures for my second piece of art.  I started to play around with the fabrics and decided to make "Falling Leaves"
 5. I wanted it to be slightly organic but also follow a pattern...
 6. Remember that there's a mat that the artwork should fit into
 7. Put the frame on, and hang! (apologies still for the bathroom...I'm working on a shower curtain to hide the not-so-pretty shower doors!

Thursday, November 1, 2012

hampering for apples

hm, not sure what the title really means...but in a rather uneventful day (is that even possible with a toddler girl needing attention every 5 minutes?!), I embarked on a project that started off as a tote, and then became a laundry hamper for baby j's bathroom.  I know, wha?  Don't know...I guess I really got too much time on my hands...I wasn't totally pleased with the project at first b/c I do better when I know what I'm making, so it actually was too big for the hamper frame.   I'll spare you of the evolution, but the end product is kind of fun.

So I had to make a few tucks and snips (yes, just like plastic surgery), and then take out the red handles that you see photographed.  It actually looks good in the bathroom now, and has inspired new artwork to be done (posting coming soon)!


je t'aime, baby j!

I've been making baby blankets amongst other things since baby j came along, and now, I'm proud to present the first of its kind--a baby j boutique original design jacket.  It is here!

Fabric purchased from Paris, expertly hand-crafted, I hope you like it!  : )


Monday, October 15, 2012

june's new giraffe cape!

I'm so glad I finally got to do this for my baby girl.  She has a giraffe blankie that she practically does everything with, so when my hubby suggested making her into the giraffe blankie, I got VERY excited.  A trip to the fabric store and a couple of hours later, I emerged from my sewing studio, proudly presenting Junebug's first mommy-made Halloween costume!  I wish I could've gotten a picture of her when she first saw the giraffe hood.  She knew right away who it looked like!

this is the giraffe cape laid out


The idea was that this would go beyond Halloween, and that she would be able to use the giraffe cape for play time.  I am so excited about this that I've decided to do custom-made giraffe capes for anyone interested.  Visit my etsy shop if you are in the market for it.  : )